Look here: Lonsdor KProg adapter user manual
How to connect or bind KProg with Lonsdor K518 for use:
If it’s the first time to use the KProg adapter, you need to bind it with K518ISE.
Connect kprog
Go to the K518ISE home page
Choose “Settings -> Bind adapter”
And follow the direction to finish binding
You have to know:
One K518ISE host can bind up to 5 adapters
And the bound adapter can not be bound to other K518ISE hosts.
Once bound, no need to bind again.
How to use KProg when using Lonsdor for key programming:
Vehicle and Key Information:
Chip model: Dedicated chip(brand new)
Remote type:433 frequency
Key embryo no.:No.24/38
PIN code requirement:Dismantle & read CEM to backup security data and program
Remote generation:Program smart key complete, remote will automatically generated
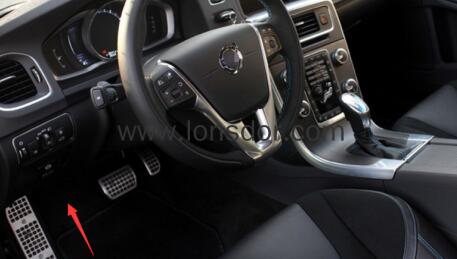
Under the lower-left of the steering wheel:
Car model: Volvo S60
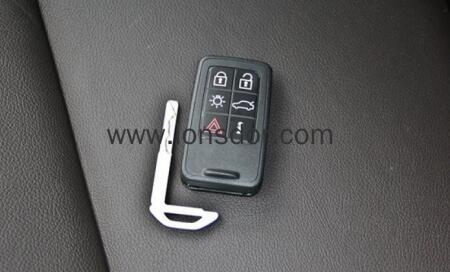
Smart sensor-to-start key (6-button)
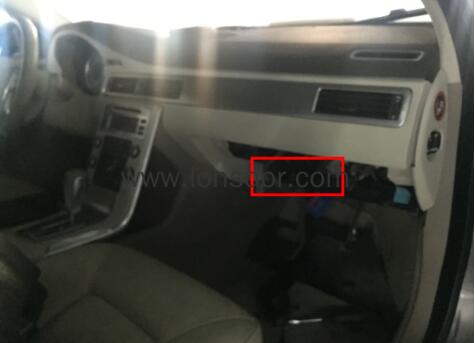
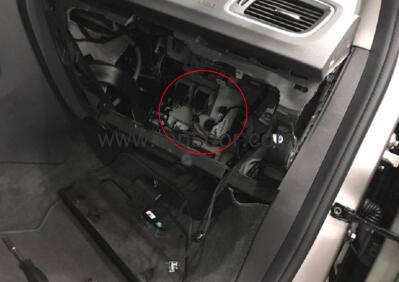
Volvo’s CEM is basically located behind the storage box which is in front of the co-pilot seat
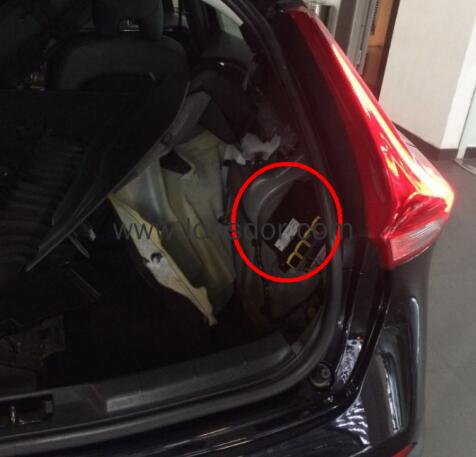
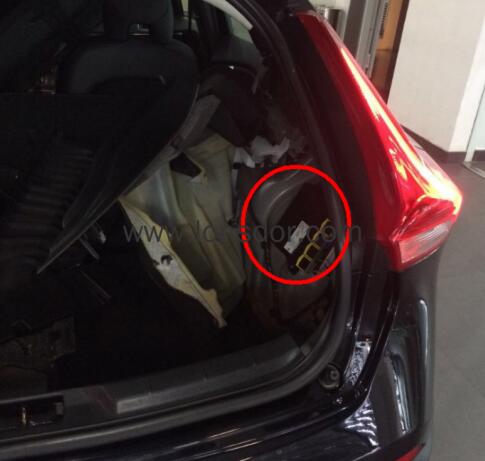
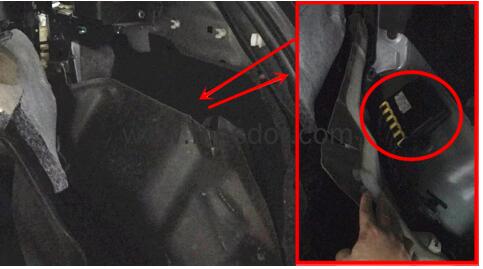
Volvo’s KVM modules are basically located in the trunk, in the right rear wheel position
Function
* Add smart key: to add a smart key or program on all key lost;
* Delete smart key: delete the already programmed smart key;
* Read the CEM security data: dismantle & read CEM to backup security data (this is a must before programming);
* Read the KVM security data:dismantle & read KVM to backup security data (this is a must before programming);
* Key identification and unlocking: to detect whether the key is a new unused one. If the remote control is invalid after programming (on condition that the battery has been installed and the remote frequency is correct), try to import the CEM safety data to unlock the key and program again after unlocking.
Note: it can only unlock the CEM safety data of the vehicle or the corresponding vehicle
* Module identification:identify the body CEM / KVM module status, please do this before all the operation, this function can ensure the module status, and distinguish between full-keyless / half-keyless. In addition, when the safety data backup is completed, and the module has been installed where it should be, please perform “module identification” again just in case and then proceed programming.
Note:
* When programming Volvo 6-button keys, please be sure to dismantle&read the CEM and KVM first, as to their location and how to read, please refer to the “Operation” or “Reference”
2.First time to use the adapter, you need to bind it with K518ISE. Go to the K518ISE home page and choose “Settings -> Bind adapter”, following the direction to finish binding. One K518ISE host can bind up to 5 adapters, and the bound adapter can not be bound to other K518ISE hosts. Once bound, no need to bind again.
* For the 6-button key, you need to dismantle & read the CEM in the co-pilot storage box,as well as the KVM in the right trunk to backup security data.
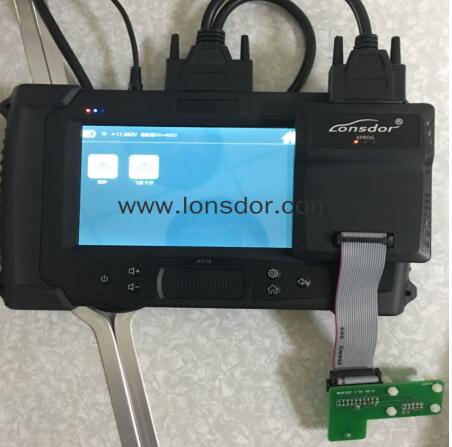
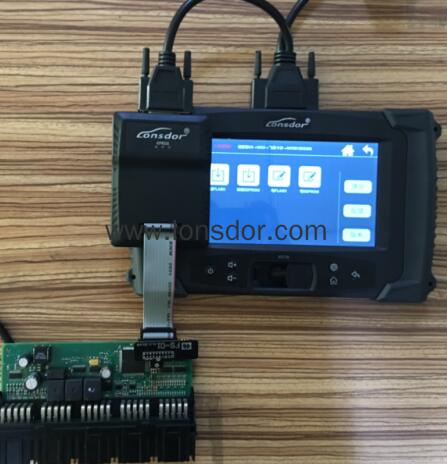
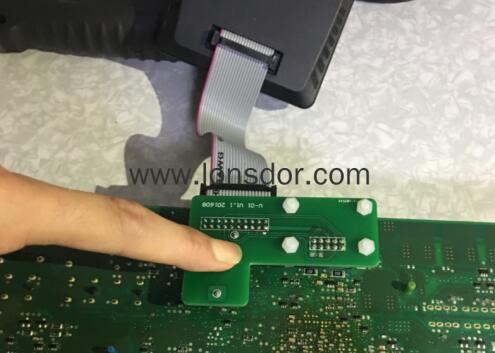
4.Connection between Lonsdor K518ISE host, adapter and RN-01 board :
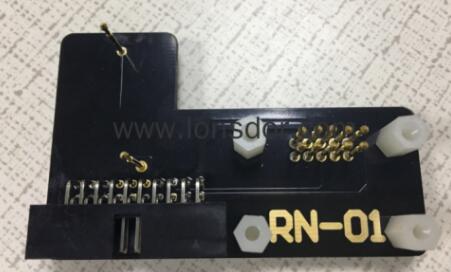
* Read Volvo CEM please use RN-01 board:
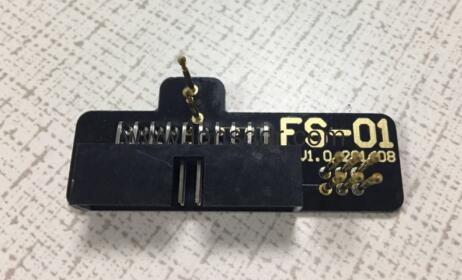
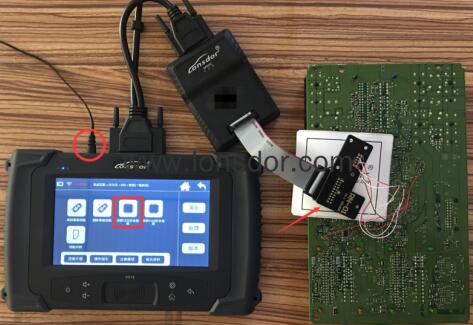
* Connection between K518ISE host, adapter and FS-01 board:
* Read Volvo KVM please use FS-01 board:
Module identification
Before all operation, please connect the car OBD to “Module identification”, which can detect the module (CEM / KVM) status, distinguish if the car is full key-less or half-key-less.
Test status results: (1) Installed. (Indicating that the corresponding module status is normal)
(2) No installation or communication failure. (That the car does not have the corresponding module, or the module status is abnormal)
After the backup of the safety data is completed, install back all the modules accordingly. Please do “Module identification” again, check to ensure that the module is well installed and in normal status. And then do programming operation.
Read CEM security data:
* Volvo’s CEM are located under the co-pilot airbag on the left, the removal of the co-pilot glove;
Volvo’s CEM is basically located behind the storage box which is in front of the co-pilot seat
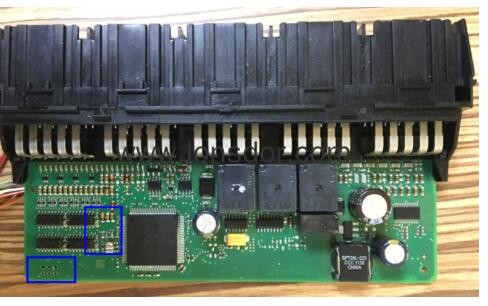
CEM boxes may have the same appearance, but the back of the circuit wire location is different, can be called type A and B .
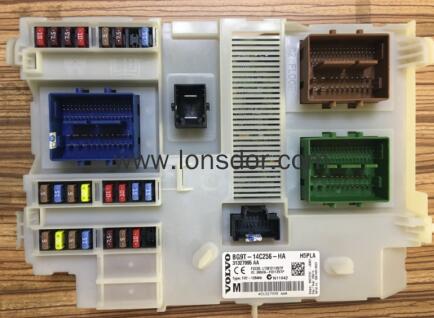
Type A: open the lid, pay attention to the black columns in the blue circle on the back of the circuit board, those are four positioning points, stably match them respectively with the white columns on RN-01 board.
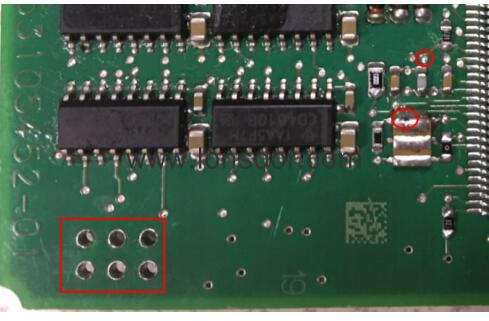
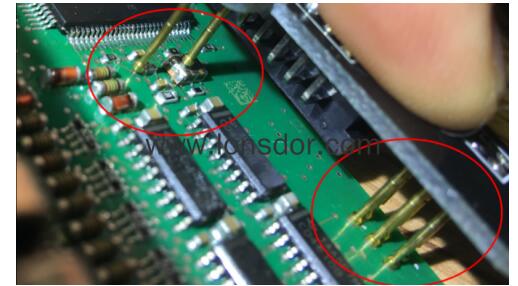
Note: The circuit board is coated with insulating glue, it is required to use the washing plate water to wash it off the blue area of the insulation coating in the contact point (solder joint) , or power can not go through, if the needle of RN-01 board is broken, it will need to wire in the corresponding locations.
(First time to use the adapter, please bind it with Lonsdor K518ISE host, please refer to”Function”)
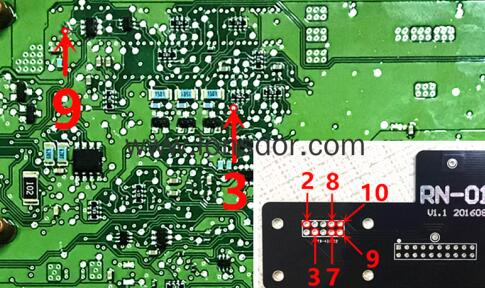
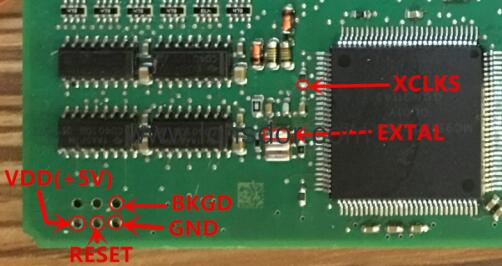
Type B: Its circuit is different from that of type B, it requires to wire to read immodata, please refer to below wire instruction:
Note: Connect power to read the data, it is required to separate RN-01 board to the motherboard to prevent conduction; welding line should not exceed 15cm.
Read KVM security data:
* Volvo’s KVM modules are located in the rear of the car rear, right rear wheel position (16 S60L recommended from the right rear door to the wheel direction);
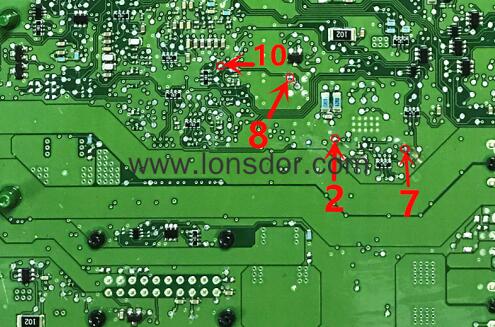
* Open the module cover, you must first use the washing plate to clean the blue area of the insulation coating,
or power can not go through, please bind it with Lonsdor K518ISE car key programmer host, please refer to”Function”)
* The points in the red area are the 8 pin insertion points on the FS-01 board:
Notice
Part of the Volvo KVM data read failure is because the chip model is different, then please:
① use the programmer to read out the data (.bin file);
② Please contact the after-sales (phone / QQ: 4009669130) and send EEPROM data to them, then the engineers will transfer the data into a special file;
③ Then please connect K518ISE to the computer, put the special file into the”file —> feature_35”folder;
④ Please continue programming to select the KVM data from the process.
Read KVM data with programmer:
Attention
* When programming Volvo 6-button key, be sure to dismantle & read the CEM and KVM, as to their location and how to read them, please refer to the “Operation” or “Reference”.
* It is required to bind the adapter when using it for the first time, you need to bind it with K518ISE. Go to the device home page and choose “Settings -> Bind adapter”, following the direction to finish binding. One K518ISE host can bind up to 5 adapters, and the bound adapter can not be bound to other K518ISE hosts. Once bound, no need to bind again.
* For 5-button key, you only need to dismantle&read the CEM in co-pilot storage box to backup security data, for 6-button key, you need to dismantle&read the CEM in co-pilot storage box, as well as the KVM in the right trunk to backup security data.
* For 6-button key, you need to first insert the key into the key slot and then operate according to the directions.
* Check if the card is locked when it can’t be inhaled in the key slot, locked key can’t be inhaled, a new card generally will not be locked.
* When install battery to Volvo models, please pay attention that the two batteries are overlapped, separated by a white paper in between, do not just replace the above one.
Disassemble is also very simple, remove the metal key, in the place where the key lies, please find a little knife with not too sharp blade, gently open it from the gap.

Leave a Reply