
This article show a guide on how to use Nissan Consult 3 Plus to perform data monitor recording function to record engine ECU data.Hope it is helpful to your work,and if you want to know more about Nissan Consult 3 Plus,check:Nissan Consult 3 Plus Projects.
Related Contents:
Nissan Consult 3 Plus Software Download
How to Install Nissan Consult 3 III Plus Diagnostic Software
How to choose a decent auto diagnostic tool to reprogram Nissan
Procedures:
1.Recording Data:
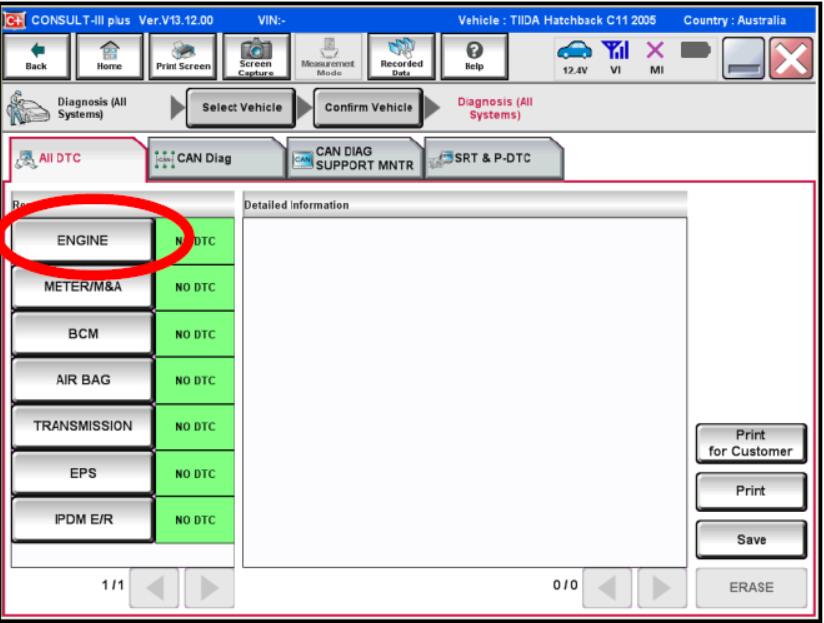
From the “All DTC” screen, select the system you need to monitor operational data from.
-In this example we will be looking at the Engine ECU.
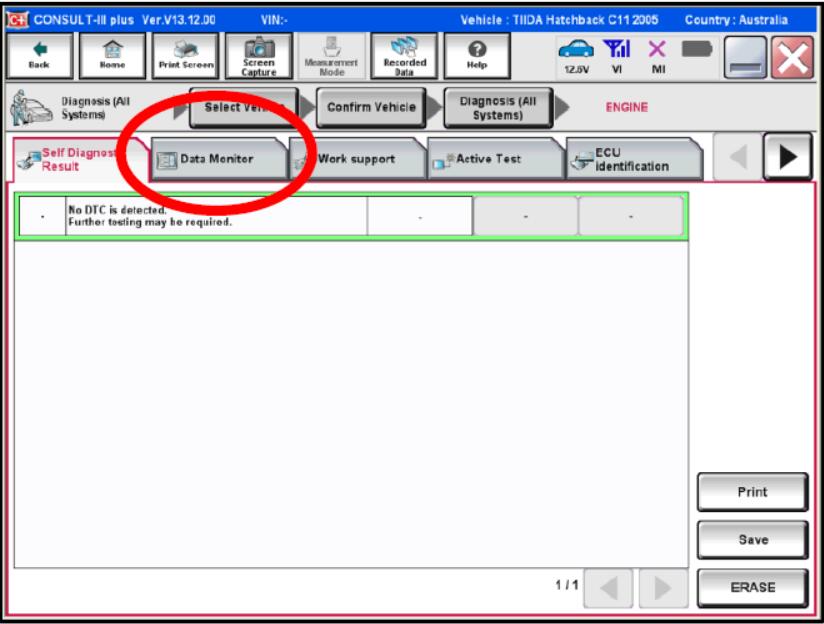
2.From the “Self Diagnostic Result” screen, select the “Data Monitor”tab.
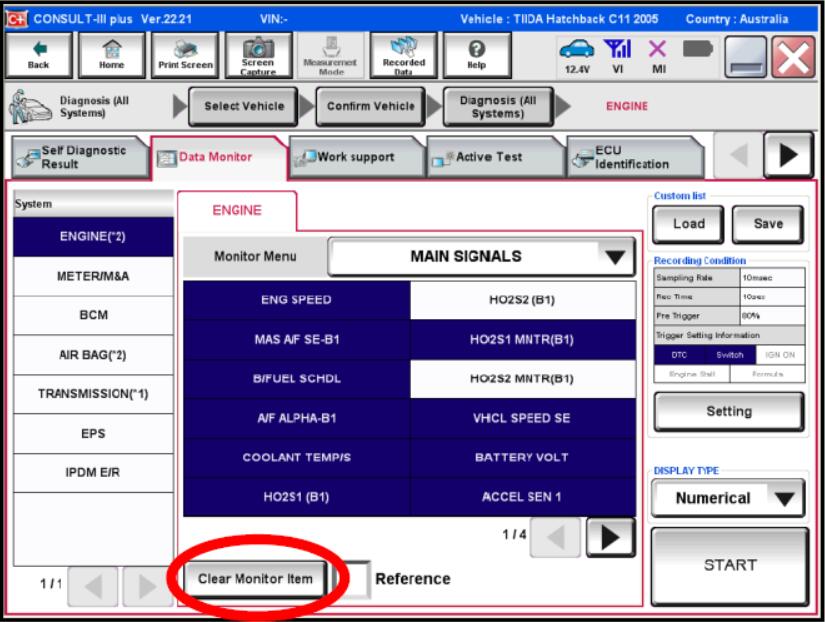
3.Selecting Data:
(i) Clear the pre selected Main Signals items by touching “Clear Monitor Item”.
(ii) Highlight the desired items from the list on the screen. Select these examples:
ENG SPEED
MAS A/F SE-B1
BATTERY VOLT
ACCEL SEN 1
T P SEN 1
START SIGNAL
INJ PULSE B1
IGN TIMING
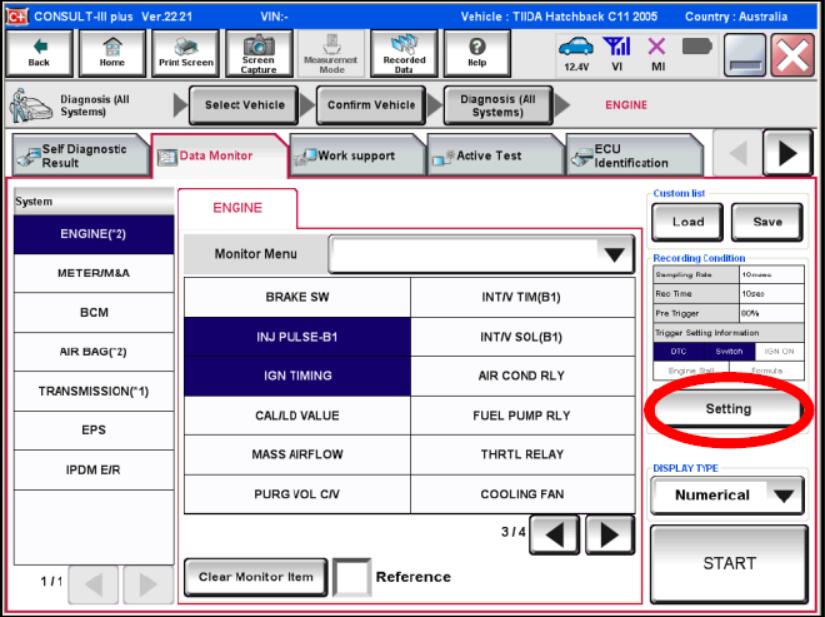
4.Setting Recording Parameters:
In some cases, the default settings may be all that are required.(i) Touch the “Setting”tab (circled right).
(ii) Sampling Rate:Slow down the “Sampling Rate” from every 10ms to every 20ms.This can be done by selecting the drop down icon. (circled). (iii) Recording Time:There maybe cases where the recording time needs to be extended beyond the 10 sec. default.For this exercise, set the “Recording Time”to 20 seconds(arrow at right) so as not to make the graphs too large.
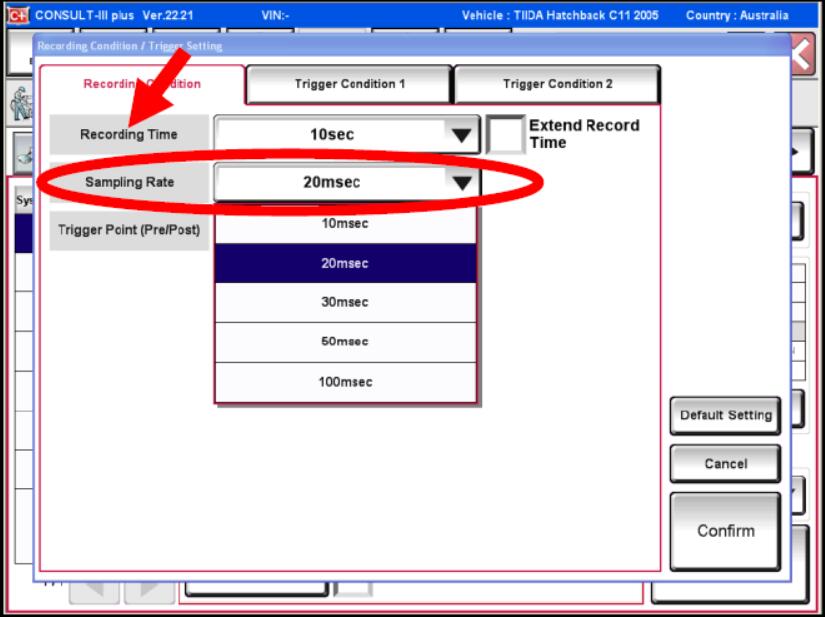
(iv) Trigger Point:Adjust the “Trigger Point” (arrow at right). Move it to 20% Preand 80% Post (circled).

5.Setting Trigger Conditions:
(i) Select the second tab “Trigger Condition 1”.This provides access to trigger condition settings.Un-select the “DTC Trigger”box if the ECM has a permanent DTC in it. Otherwise, the recording will start automatically as soon as a DTC is detected.
(ii) Select “Confirm” on the bottom right of the screen.
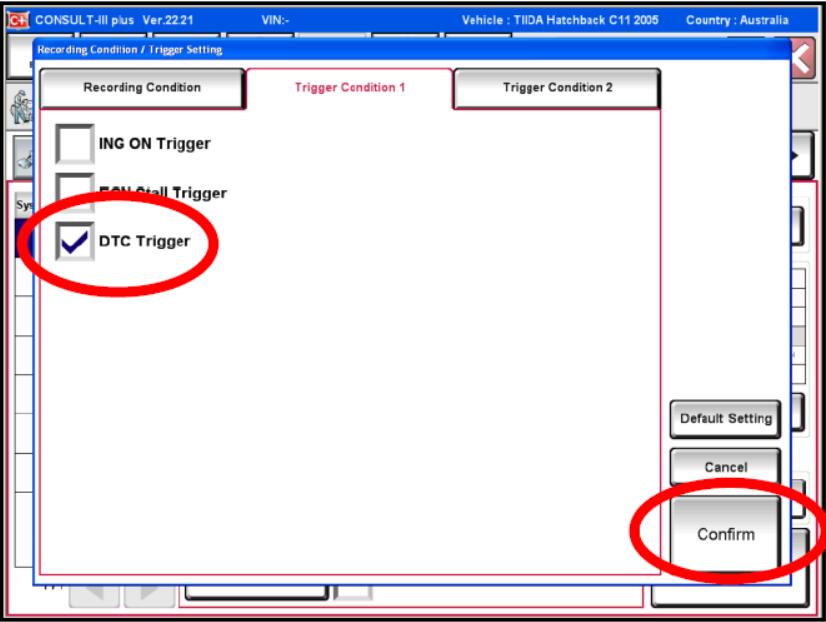
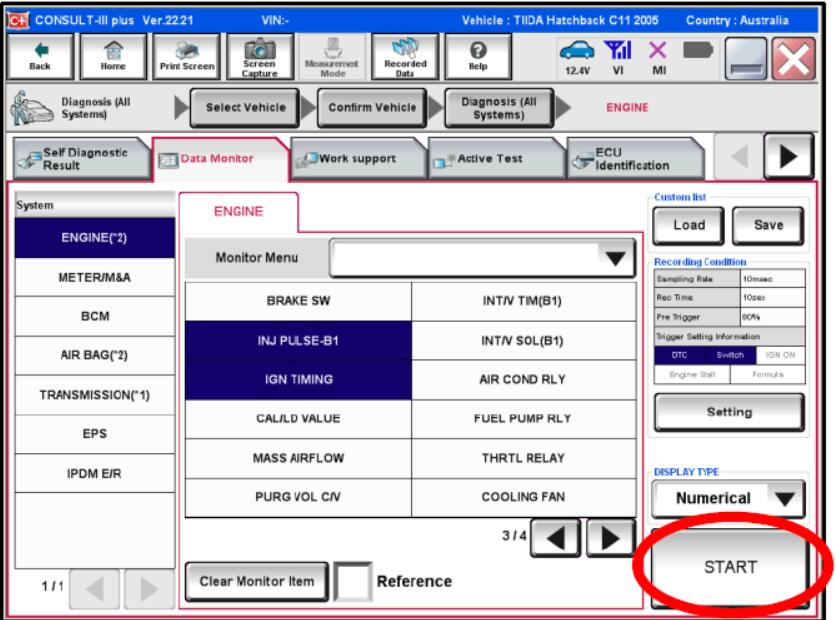
(iii) Touch “Start” once the screen returns to the“Monitor Menu” screen.
6.Data Recording outline:
The recording activityis basically as follows;(i) Touch record.(ii) Immediately start Engine & allow to idle for 2 seconds max.(iii) Race engine twice & allow to idle again until the end of recording.The above must be carried out as quickly as possible in order to maximise the recorded data on the graphs.
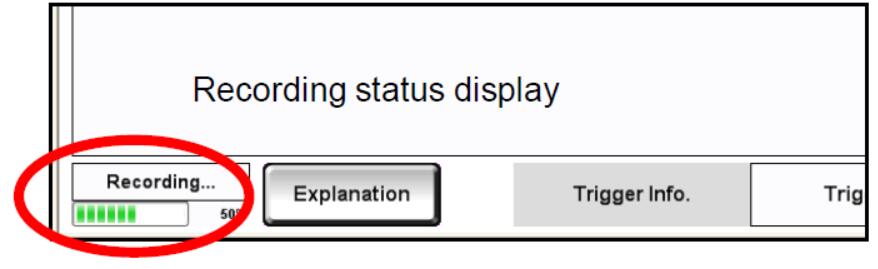
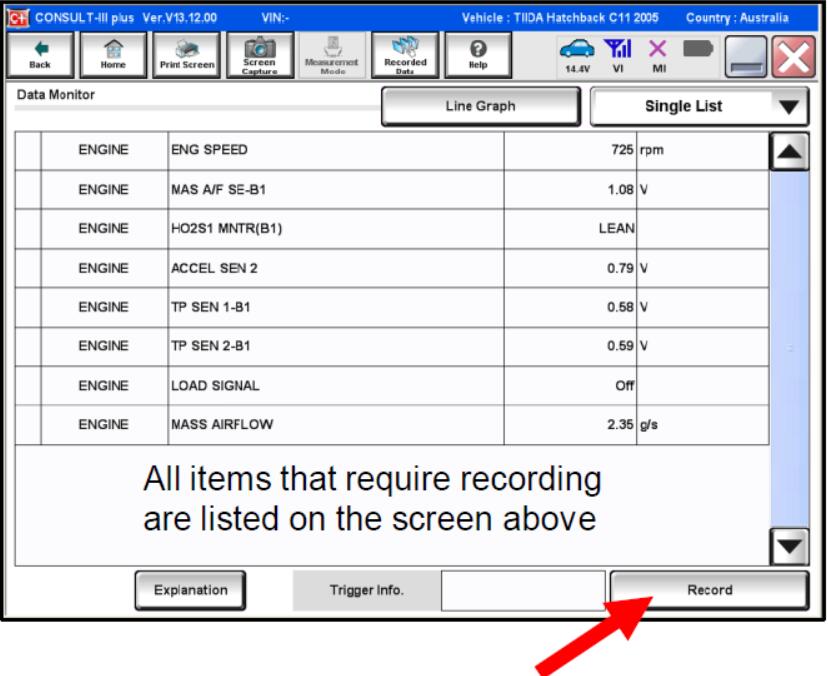
7.Start the Recording:
(i)Once prepared, touch “RECORD”on the bottom right of the screen to capture the activity of the engine as described above in step #6.Watch the recording time bar graph (circled at right). Recording stops at 100%.
Nissan Consult 3 Plus Data Monitor Recording Function (10)
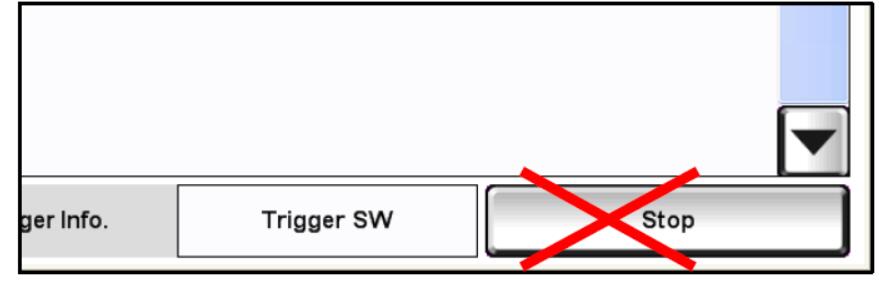
NOTE:
DO NOT PRESS THE “Stop” BUTTON DURING THE RECORDING OR THE DATA WILL BE LOST.
(ii) Once the recording has stopped, the graph of data is automatically displayed.
Data can be viewed as required in either graphical or numerical form.
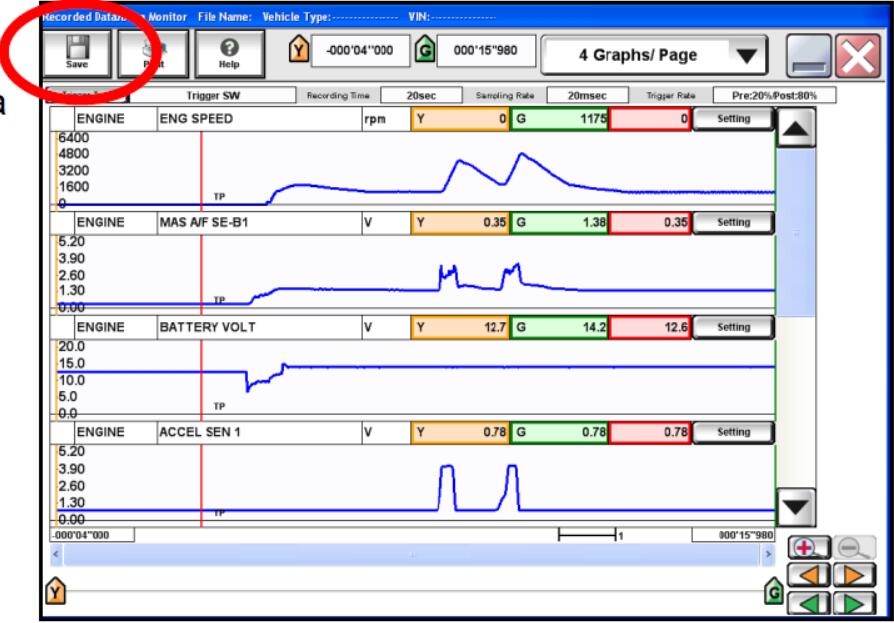
8.Saving the Recording:
The recorded file should now be saved so it is not accidently lost before it can be reviewed in detail.
(i)Select the “Save” button (circled) at the top left of the screen.
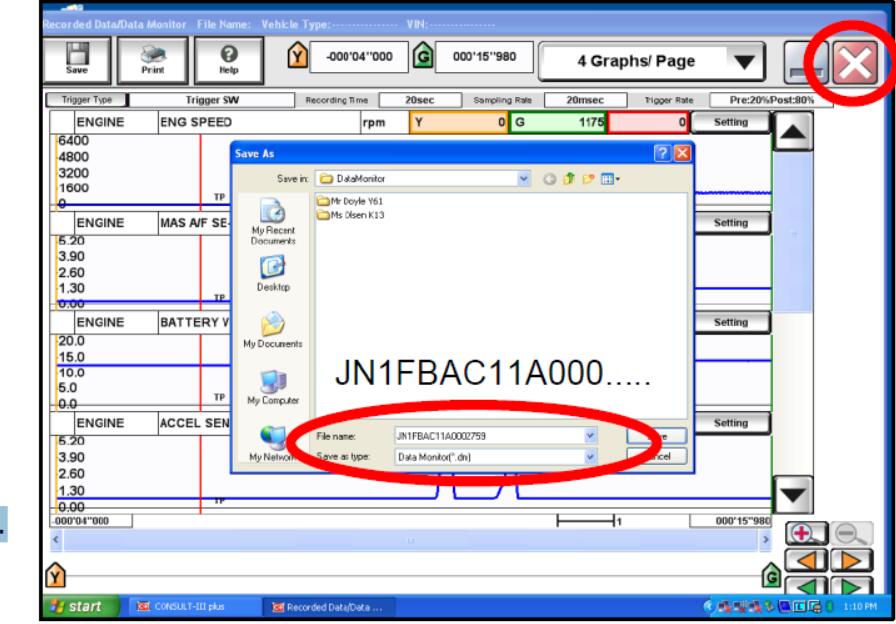
(ii) This opens the “Data Monitor” dialogue box. Enter the vehicle’s VIN as the “File name” to make the file easy to find later.
The file is now safely stored on the Toughbook in the CONSULT-III plus “Data Folders”.
(iii) Close the recording by selecting the red “X” Close button at the top right of the screen (circled at top right).
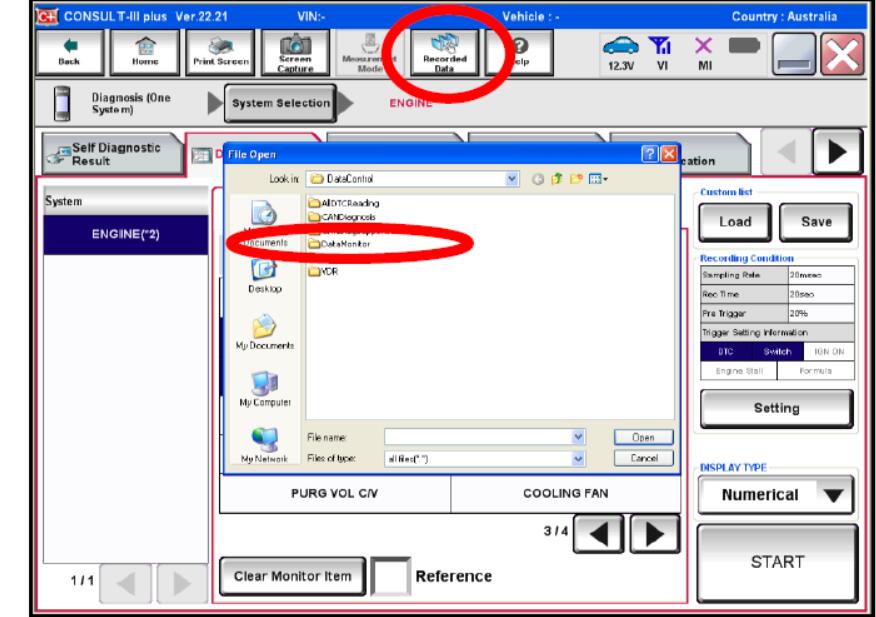
9.Accessing and Reviewing Recorded Data:
(i) Click on the “Recorded Data” icon at the top of the screen (circled).
(ii) Since this is a Data Monitor recording, select the “DataMonitor” folder.
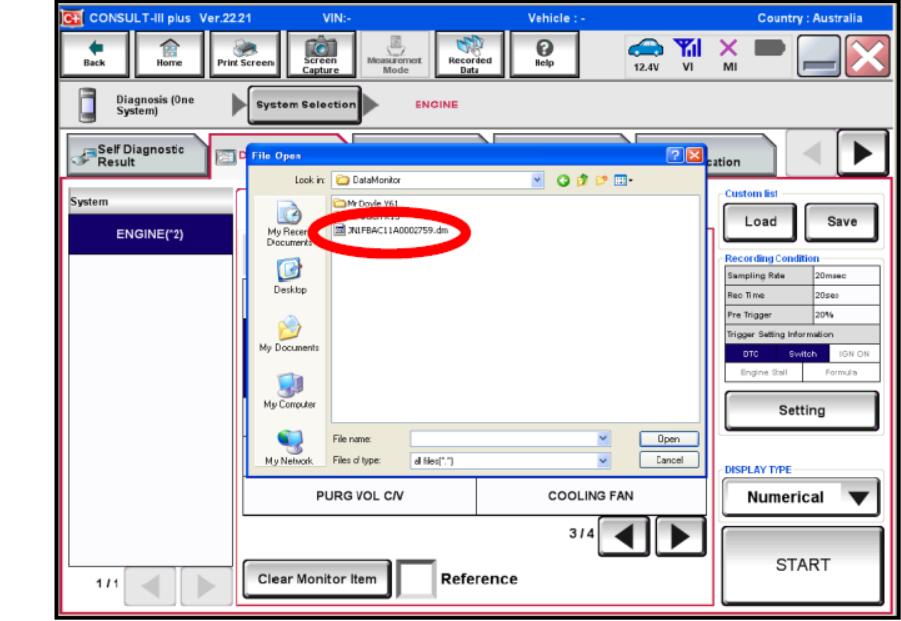
(iii) Select and Open the previously saved file (JN1FBAC11A000…..).
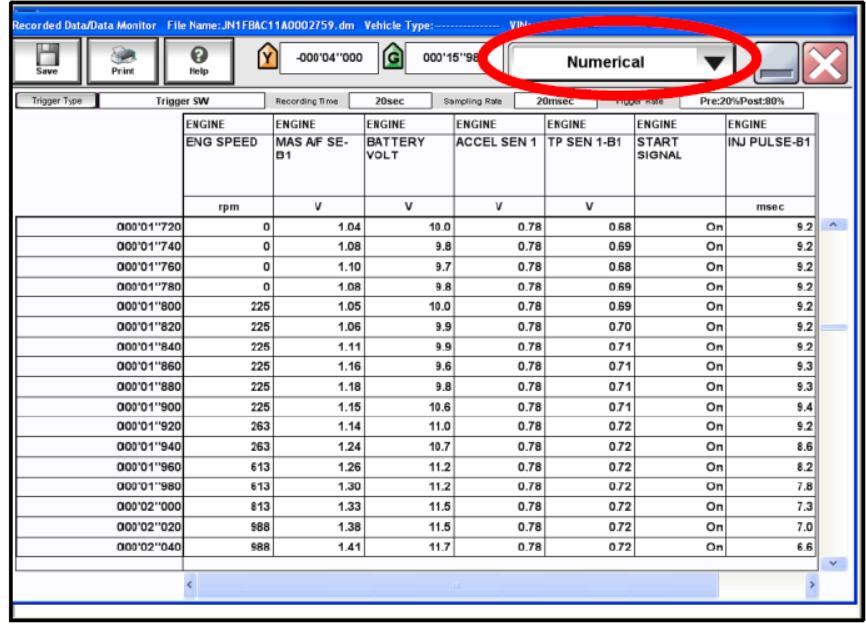
10.Reviewing Data File:
The file can be displayed in graphical or numerical formats as required.
(i) In graphical display, one graph can be “dragged” from its current position in the screen order to be located alongside any other signal for a direct comparison.
(ii) If so desired, you can compress more data into the same field. Select the “+” or “-” symbol (circled).
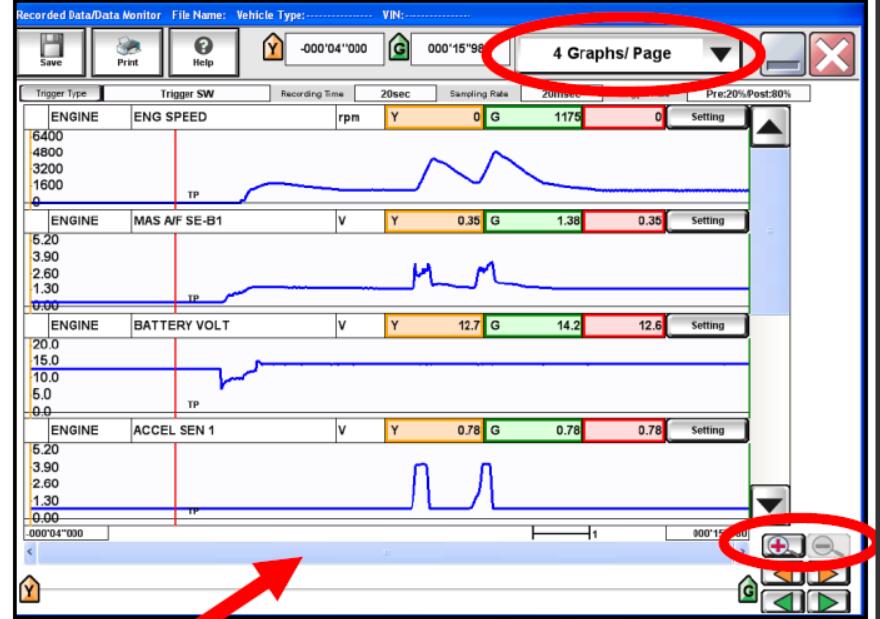
(iii) It‟s possible to slide the data back in time to catch activity well before “RECORD” was touched (represented by vertical red line near left of screen).
Use the bottom blue slider tab on the screen to do so (arrowed).
11.Sending Recorded Files to TechLine:
Once a recording has been saved, it can be readily accessed and attached to a TechLine Contact.
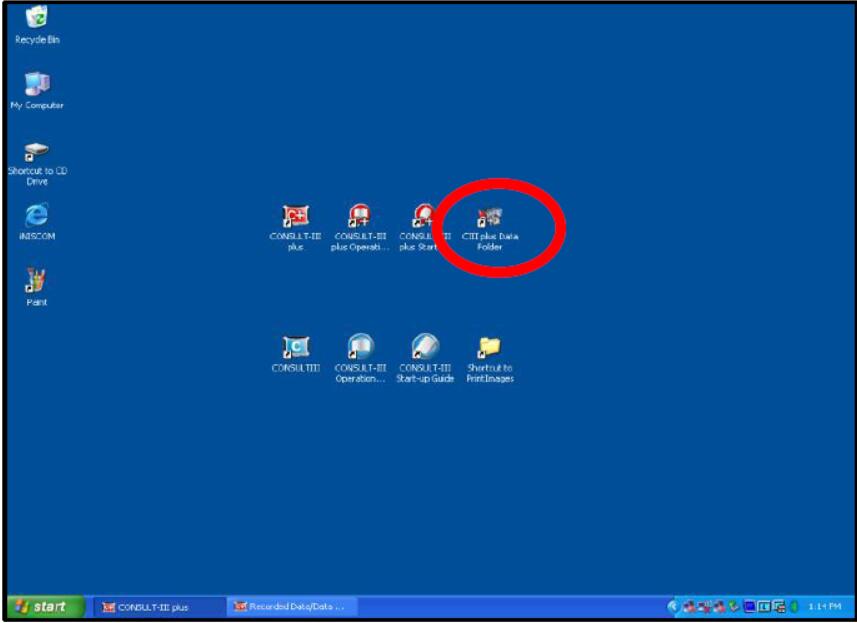
(i) Minimise CONSULT and click on the “CIII plus Data Folder” icon on the desktop.
These files are saved in a specific folder within the CONSULT application files:
C:\CONSULT-III_plus\UserData\DataControl\DataMonitor
(ii) Select the “DataControl” folder.
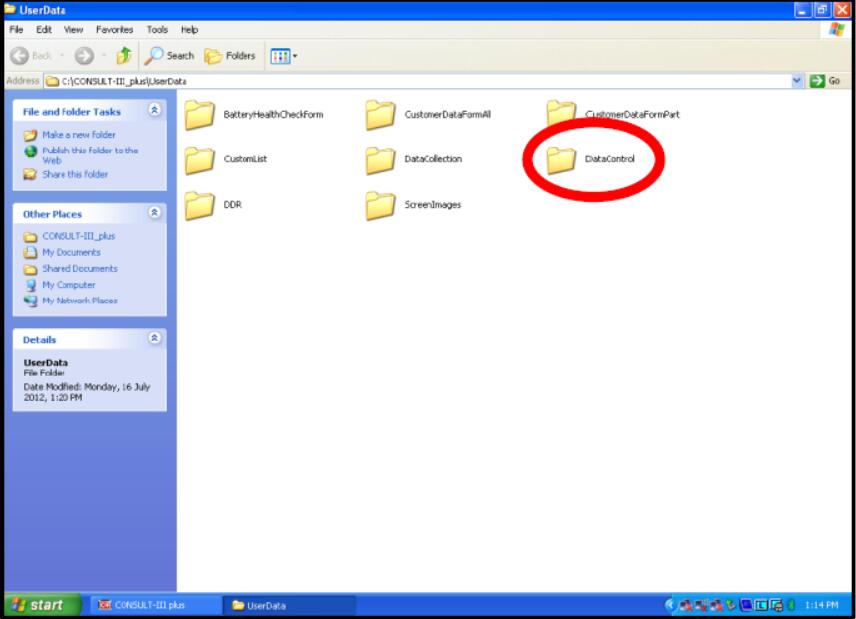
This is where all saved data of any kind is located.
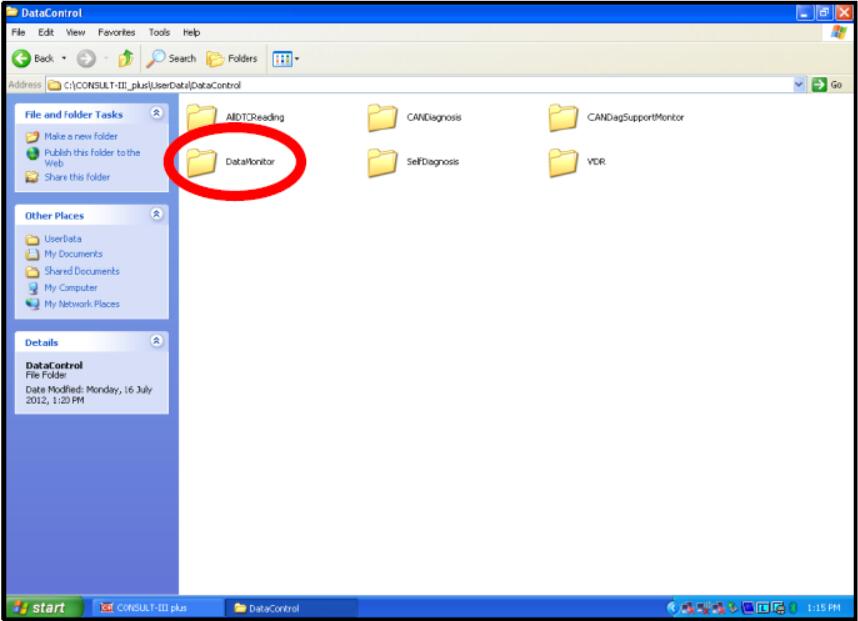
(iii) Select the “Data Monitor” folder.
Since you were using Data Monitor, it is in this folder that your saved file will be stored.
(iv) Your recorded file identified by the VIN is found.
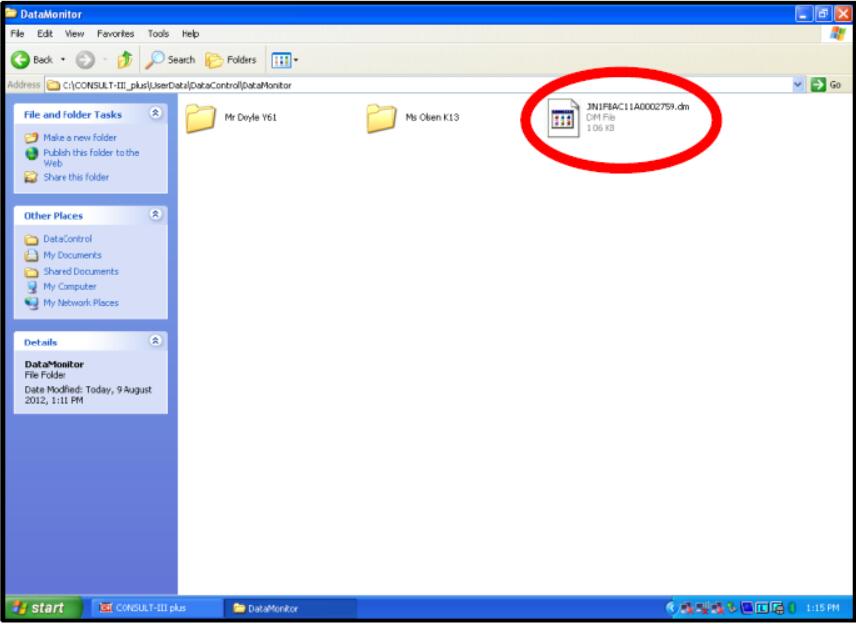
NOTE: Since this is a CONSULT embedded “DM” file, it cannot be opened outside of CONSULT-III plus.Simply attach this file to your TechLine contact.It is important that the VIN is used as the file name to enable easy identification and access in the future.If there is more than one file, it will help TechLine if they are identified by the same VIN with an alphabetical suffix, i.e.
JN1FBAC11A0001234_A
JN1FBAC11A0001234_B
JN1FBAC11A0001234_C … etc
Leave a Reply